Chevrolet Captiva Service & Repair Manual: Front Wheelhouse
| Do not damage any inner panels
or reinforcements. |
| If the location of the original
plug weld holes can not be determined, space the plug weld holes every 1
1/2 inches apart. Some panels may have structural weld thru adhesive. It
is required to replace the weld thru adhesive with an additional spot weld
between each factory spot weld. |
Removal
| 1. |
Remove front tie bar as outlined in
Upper Tie Bar. |
| 2. |
Locate and drill out all factory welds.
Note number and location of welds for installation of front wheelhouse,
Fig. 1. |
| 3. |
Remove damaged front wheelhouse,
Fig. 2. |
|
Installation
| 1. |
Drill 5/16 inch holes for plug weld
as required on service component, in locations noted from original
assembly. |
| 2. |
Prepare all mating surfaces as required. |
| 3. |
Apply 3M® Weld Thru Coating P/N 05916
or equivalent to all mating surfaces. |
| 4. |
Position front wheelhouse to vehicle
using three dimensional measuring equipment. Clamp front wheelhouse
into place, Fig. 3. |
| 5. |
Plug weld accordingly, Fig.
4. |
| 6. |
Install front tie bar as outlined in
Upper Tie Bar. |
| 7. |
Clean and prepare all welded surfaces. |
| 8. |
Apply sealers and corrosion protection
materials to repair area, as required. |
| 9. |
Refinish repaired area. |
| 10. |
Install all related panels and components. |
| 11. |
Connect battery ground. |
|
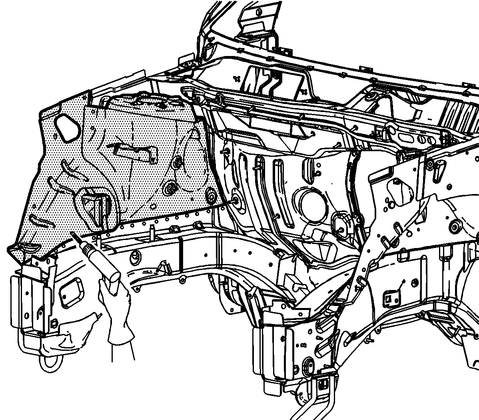
Fig.
1 Front wheelhouse weld locations

Fig.
2 Front wheelhouse removal
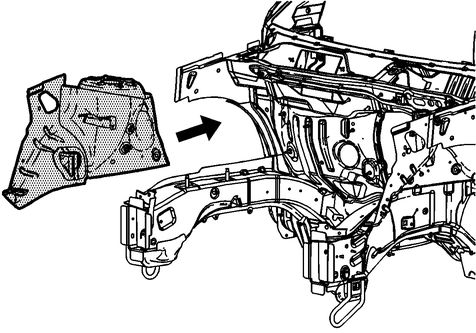
Fig.
3 Front wheelhouse installation
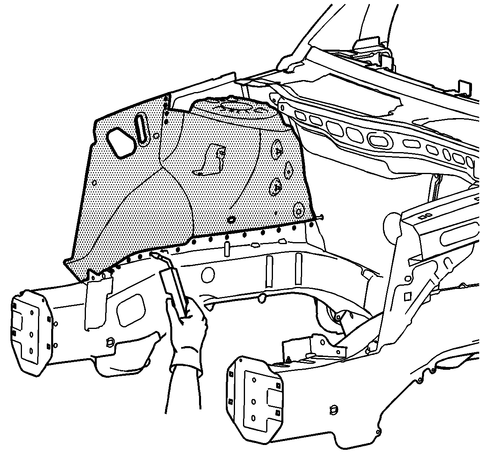
Fig.
4 Front wheelhouse plug weld locations
Removal
Do not allow radiator to swing
after removing front suspension crossmember. Upper portion of radiator should
be fixed using strings.
1.
Instal ...
Removal
1.
Remove two fuel door bolts, Fig.
1.
2.
Remove fuel door, Fig. 1.
Installation
Reverse procedure to ...
 Front Sub-Frame
 Fuel Door