Chevrolet Captiva Service & Repair Manual: Brake Line R&R
Front
Removal
| 1. |
Raise and support the vehicle. |
| 2. |
Remove the tire and wheel assembly. |
| 3. |
Disconnect the brake pipe fitting (1)
from the brake hose. Cap the brake pipe fitting to prevent brake
fluid loss and contamination, Fig. 1. |
| 4. |
Remove the brake hose bolt (1) securing
the brake hose bracket to the wheelhouse, Fig. 2. |
| 5. |
Release the wheel speed sensor harness
retaining clips (1) and release the harness, Fig. 3. |
| 6. |
Remove the brake hose bracket bolt
(1), Fig. 4. |
| 7. |
Remove the brake hose fitting bolt
(1) from the brake hose and the caliper, Fig. 5. |
| 8. |
Remove the brake hose (2) from the
caliper, Fig. 5. |
| 9. |
Remove and discard the brake hose fitting
gaskets (3). Do not reuse the brake hose fitting gaskets, Fig.
5. |
| 10. |
Remove the brake hose. |
|
Installation
| 1. |
Install the brake hose. |
| 2. |
Install new brake hose fitting gaskets.
Install new brake hose fitting gaskets. |
| 3. |
Install the brake hose to the caliper. |
| 4. |
Install the brake hose fitting bolt
to the brake hose and the caliper. Torque the bolt to 38
ft. lbs. |
| 5. |
Install the brake hose bracket bolt.
Torque the bolt to 106 inch lbs. |
| 6. |
Install the wheel speed sensor harness
and secure the retaining clips. |
| 7. |
Install the brake hose bolt securing
the brake hose bracket to the wheelhouse. Torque the bolt
to 106 inch lbs. |
| 8. |
Connect the brake pipe fitting to the
brake hose. Torque the fitting to 13 ft. lbs. |
| 9. |
Bleed the hydraulic brake system. |
| 10. |
Install the tire and wheel assembly. |
|
Rear
Removal
| 1. |
Raise and support the vehicle. |
| 2. |
Remove the tire and wheel assembly. |
| 3. |
Disconnect the brake pipe fitting (1)
from the brake hose. Cap the brake pipe fitting to prevent brake
fluid loss and contamination, Fig. 6. |
| 4. |
Remove the brake hose bolt (1) securing
the brake hose bracket to the wheelhouse, Fig. 7. |
| 5. |
Remove the brake hose bracket bolt
(1), Fig. 8. |
| 6. |
Remove the brake hose fitting bolt
(1) from the brake hose and the caliper, Fig. 9. |
| 7. |
Remove the brake hose (2) from the
caliper, Fig. 9. |
| 8. |
Remove and discard the brake hose fitting
gaskets (3). Do not reuse the brake hose fitting gaskets, Fig.
9. |
| 9. |
Remove the brake hose. |
|
Installation
| 1. |
Install the brake hose. |
| 2. |
Install new brake hose fitting gaskets.
Install NEW brake hose fitting gaskets. |
| 3. |
Install the brake hose to the caliper. |
| 4. |
Install the brake hose fitting bolt
to the brake hose and the caliper. Torque the bolt to 38
ft. lbs. |
| 5. |
Install the brake hose bracket bolt.
Torque the bolt to 106 inch lbs. |
| 6. |
Install the brake hose bolt securing
the brake hose bracket to the wheelhouse. Torque the bolt
to 106 inch lbs. |
| 7. |
Connect the brake pipe fitting to the
brake hose. Torque the fitting to 13 ft. lbs. |
| 8. |
Bleed the hydraulic brake system. |
| 9. |
Install the tire and wheel assembly. |
|
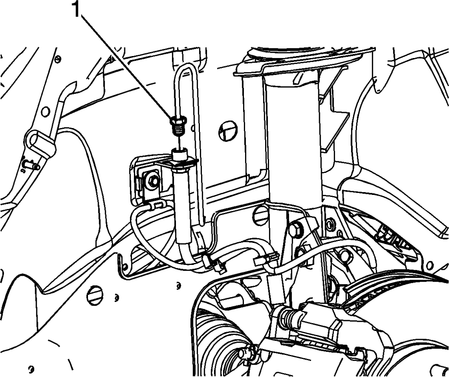
Fig.
1
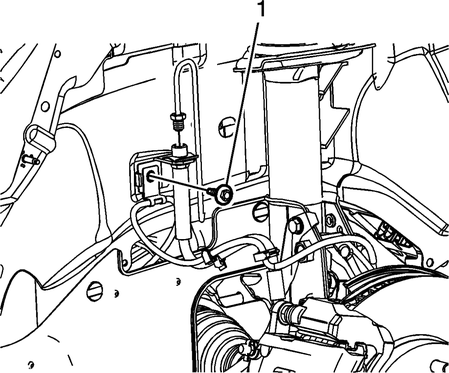
Fig.
2
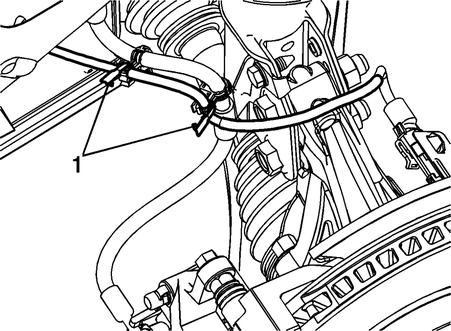
Fig.
3
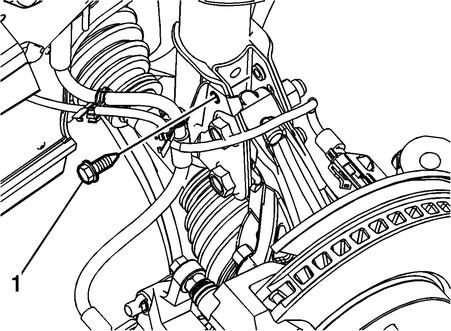
Fig.
4
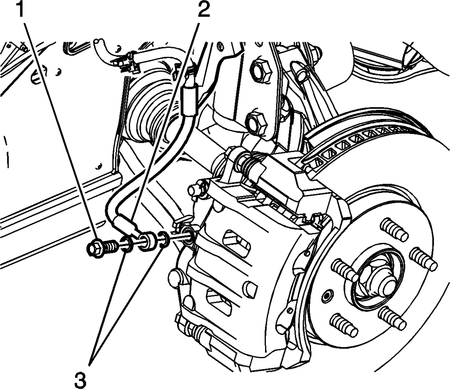
Fig.
5
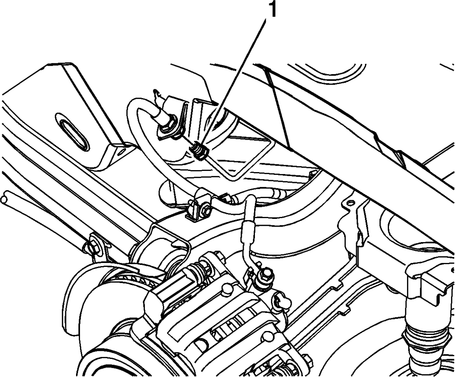
Fig.
6
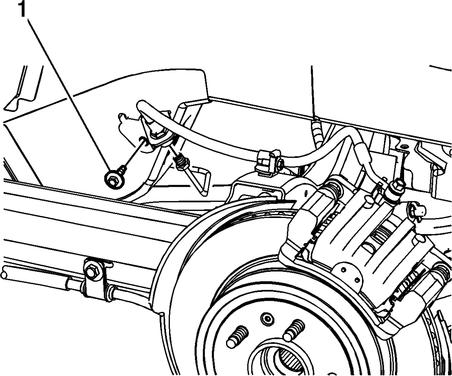
Fig.
7
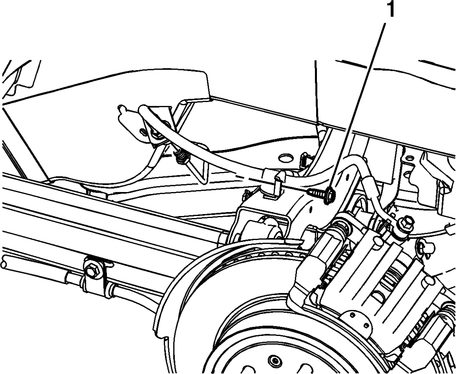
Fig.
8
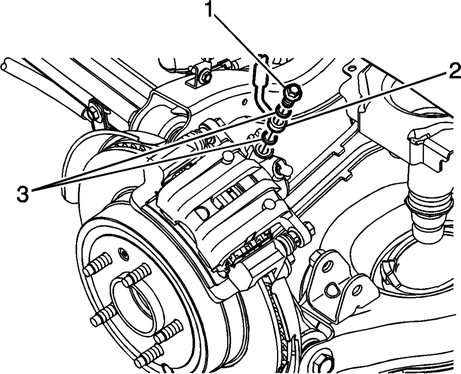
Fig.
9
Replacement
1.
Disconnect the electrical connection.
2.
Rotate the stop lamp switch counterclockwise
to remove it from the pedal assembl ...
Removal
1.
Using a suitable tool, remove the brake
fluid from the brake master cylinder reservoir.
2.
Discard the brake fluid into an ap ...
More about:
Chevrolet Captiva Owners Manual > Keys, Doors, and
Windows: Windows
Warning
Never leave a child, a helpless
adult, or a pet alone in a vehicle,
especially with the windows
closed in warm or hot weather.
They can be overcome by the
extreme heat and suffer
permanent injuries or even death
from heat stroke.
Power Windows
Warning
Children could be serio ...
 Brake Light Switch R&R
 Brake Master Cylinder R&R