Chevrolet Captiva Service & Repair Manual: Floor Console
| 1. |
Remove front seat assembly bolts. |
| 2. |
Lift seat upward at rear of seat. |
| 3. |
Disconnect seat electrical connectors. |
| 4. |
Slide seat rearward to disengage adjuster
hooks holding seat to floor pan. |
| 6. |
Slide front floor console cup holder
to full rearward position. |
| 7. |
Remove front floor console compartment
liner. |
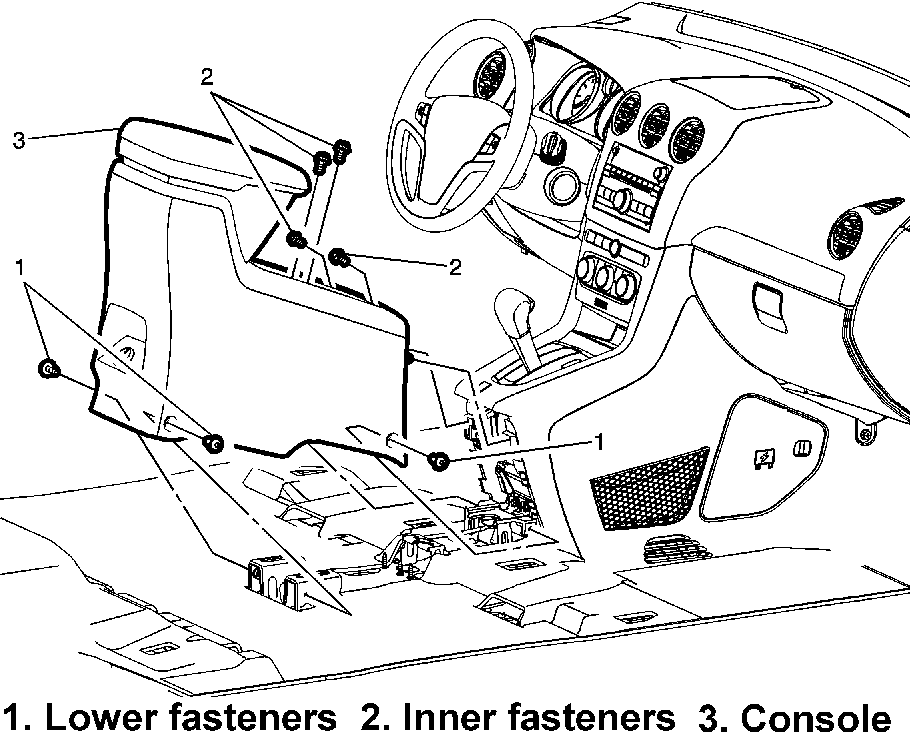
| 8. |
Remove front floor console lower fasteners,
Fig. 1. |
| 9. |
Remove front floor console interior
fasteners. |
| 10. |
Disconnect front floor console electrical
connections. |
| 11. |
Remove front floor console assembly. |
| 12. |
Reverse procedure to install, noting
following: |
| |
a. |
Torque front floor console accessory
trim plate screws to 18 inch lbs. |
| |
b. |
Torque front floor console bolts
to 70 inch lbs. |
| |
c. |
Torque front floor console screws
to 18 inch lbs. |
|

Fig.
1 Floor console replacement. Captiva Sport
1.
Remove front door trim panel as outlined
under "Door Trim Panel."
2.
Remove exterior rearview mirror cover
using a sui ...
Refer to Fig. 1
when performing following procedures.
1.
Remove windshield garnish molding.
2.
Remove sunshade anchors, sunsha ...

 Exterior Rearview Mirrors
 Headliner