Chevrolet Captiva Service & Repair Manual: B-Pillar
| Section in specified areas only.
Sectioning outside of these areas may compromise the structural integrity
of the vehicle. The door frame can be replaced at factory seams, but requires
the removal of the windshield and the roof. The sectioning procedures have
been developed as a more cost effective alternative to complete replacement.
The specific area to be sectioned is determined by the extent of the damage
to the vehicle. |
| Warning: Foam sound deadeners
must be removed from areas within 6 inches of where flame is to be used
for body repairs. When reinstalling foam sound deadeners, avoid inhaling
fumes as bodily injury may result. |
| Do not damage any inner panels
or reinforcements. |
| In any area damaged beyond recognition,
or if structural weld thru adhesive is present, space the plug weld holes
1 1/2 inches apart. |
| To create a solid weld with minimum
heat distortion make one inch stitch welds along the seam with one inch
gaps between. Then go back and complete the stitch weld. |
Removal
| 2. |
Disconnect battery ground. |
| 3. |
Remove all related panels and components. |
| 4. |
Repair as much damage as possible to
factory specifications. |
| 5. |
Remove sealers and corrosion protection
materials from repair area. |
| 6. |
On original outer door frame, measure
down from lower edge of door opening 5.3 inches (A) and mark a horizontal
line, Fig. 1. |
| 7. |
Cut panel where sectioning is to be
performed. |
| 8. |
Locate and drill out all factory welds.
Note number and location of welds for installation of B-Pillar,
Fig. 2. |
| 9. |
Remove damaged B-Pillar. |
|
Installation
| 1. |
Cut replacement center pillar section
in corresponding locations to fit original panel. Sectioning joint
should be trimmed to allow 1 1/2 times metal thickness at sectioning
joint. |
| 2. |
Create a two inch backing plate (A)
from unused portion of service component. Trim backing plate as
required to fit behind sectioning joint where there is no reinforcement,
Fig. 3. |
| 3. |
Drill 5/16 inch plug weld holes along
sectioning cut on remaining original component. Locate these holes
1/2 inch from edge and spaced 1 1/2 inches apart. |
| 4. |
Drill 5/16 inch plug weld holes in
service component as required in locations noted from original panel
and along sectioning cut, Fig. 4. |
| 5. |
Prepare all mating surfaces as required. |
| 6. |
Apply 3M® Weld Thru Coating P/N 05916,
or equivalent, to all mating surfaces. |
| 7. |
Fit backing plate halfway into sectioning
joint, clamp and plug weld to vehicle, Fig. 5. |
| 9. |
Plug weld accordingly, Fig.
6. |
| 10. |
Stitch weld sectioning joint. |
| 11. |
Clean and prepare all welded surfaces. |
| 12. |
Apply sealers and corrosion protection
materials to repair area, as required. |
| 13. |
Refinish repaired area. |
| 14. |
Install all related panels and components. |
| 15. |
Connect battery ground. |
|
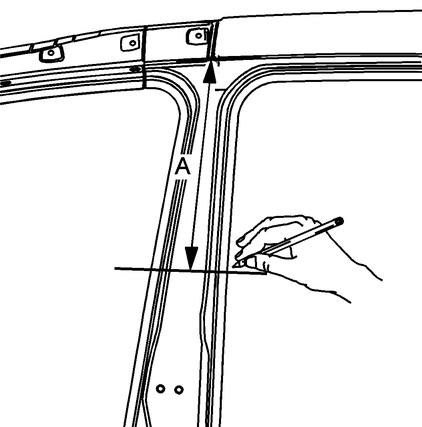
Fig.
1 B-Pillar upper cut line location
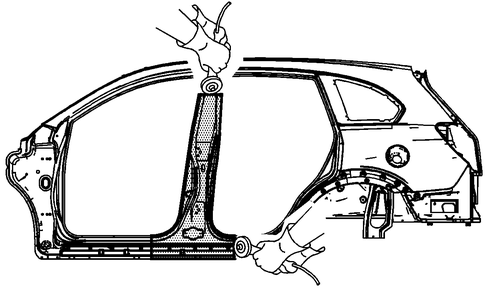
Fig.
2 B-Pillar weld locations
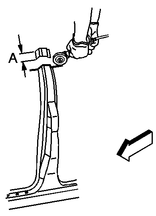
Fig.
3 B-Pillar backing plate
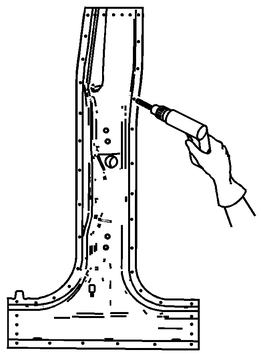
Fig.
4 B-Pillar preparation
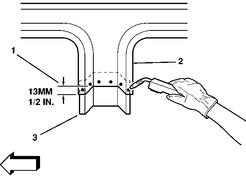
Fig.
5 B-Pillar backing plate installation
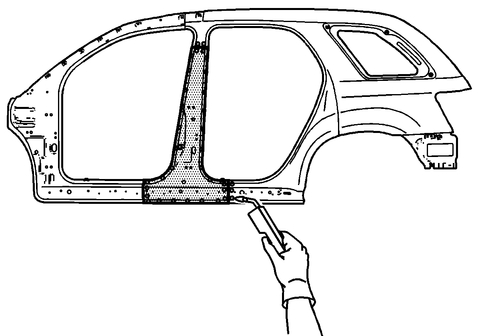
Fig.
6 B-Pillar plug weld locations
To remove and install the B-pillar in a Chevrolet Captiva model year (from 2006 to 2018), you typically follow these steps. First, ensure the vehicle is parked on a flat surface and the parking brake is engaged. Start by disconnecting the negative terminal of the battery to prevent electrical accidents. Next, remove any trim pieces or panels covering the B-pillar area using appropriate tools.
Once the B-pillar area is accessible, carefully remove any fasteners, bolts, or screws securing the pillar to the vehicle's frame. Keep track of these fasteners as they will be needed during reinstallation. With the fasteners removed, gently pry or wiggle the B-pillar to release it from its mounting points. Take care not to damage surrounding components or the pillar itself.
When installing the new B-pillar or reattaching the existing one, align it properly with the vehicle's frame and mounting points. Secure the pillar in place using the previously removed fasteners, bolts, or screws, ensuring they are tightened to the manufacturer's specifications. Finally, reinstall any trim pieces or panels that were removed earlier, reconnect the negative battery terminal, and test the B-pillar to ensure it is securely in place.
Section in specified areas only.
Sectioning outside of these areas may compromise the structural integrity
of the vehicle. The door frame can be replaced at factory seams, but requires ...
Do not damage any inner panels
or reinforcements.
If the location of the original
plug weld holes can not be determined, space the plug weld holes every 1
1/2 inches ap ...
More about:
Chevrolet Captiva Owners Manual > Vehicle Checks: Wiper Blade Replacement
Windshield wiper blades should be
inspected for wear and cracking.
See Maintenance Schedule on
page 11-2.
Replacement blades come in
different types and are removed in
different ways. For proper type and
length, see Maintenance
Replacement Parts on page 11-13.
Caution
Allowing the wipe ...
 A-Pillar
 Cowl Panel