Chevrolet Captiva Service & Repair Manual: Front Door Latch
Removal
| 1. |
Remove front side door trim panel. |
| 2. |
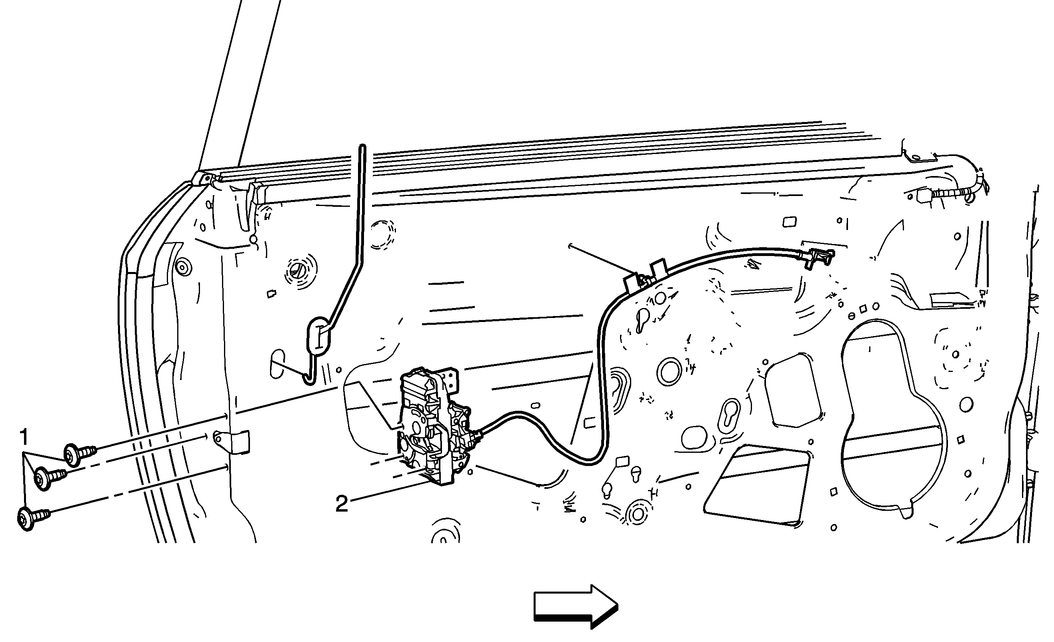
Remove three front door latch screws,
Fig. 1. |
| 3. |
Remove water deflector. |
| 4. |
Release inside door handle cable retainers. |
| 5. |
Disconnect front side door latch electrical
connector. |
| 6. |
Remove front side door latch rods. |
| 7. |
Remove front door latch. |
|
Installation
| Reverse procedure to install.
Torque latch screws to 89 inch lbs. |

Fig.
1 Front door latch removal
Removal
1.
Remove front side door water deflector.
2.
Disconnect electrical connector.
3.
Remove access hole plug ...
If the location of the original
plug weld holes can not be determined, space the plug weld holes every 1
1/2 inches apart. Some panels may have structural weld thru adhesive. It
is ...

 Front Door Handle
 Front Floor