Chevrolet Captiva Service & Repair Manual: Fender
Removal
| 1. |
Remove front bumper as outlined in
Front Bumper. |
| 2. |
Remove fender wheel opening molding. |
| 3. |
Remove wheelhouse liner as outlined
in Fender Liner. |
| 4. |
Remove rocker panel molding as outlined
in Rocker Molding. |
| 5. |
Remove fender center molding. |
| 6. |
Remove nine fender bolts, Fig.
1. |
| 7. |
Remove fender, Fig. 1. |
|
Installation
| Reverse procedure to install.
Torque fender bolts to 80 inch lbs. |
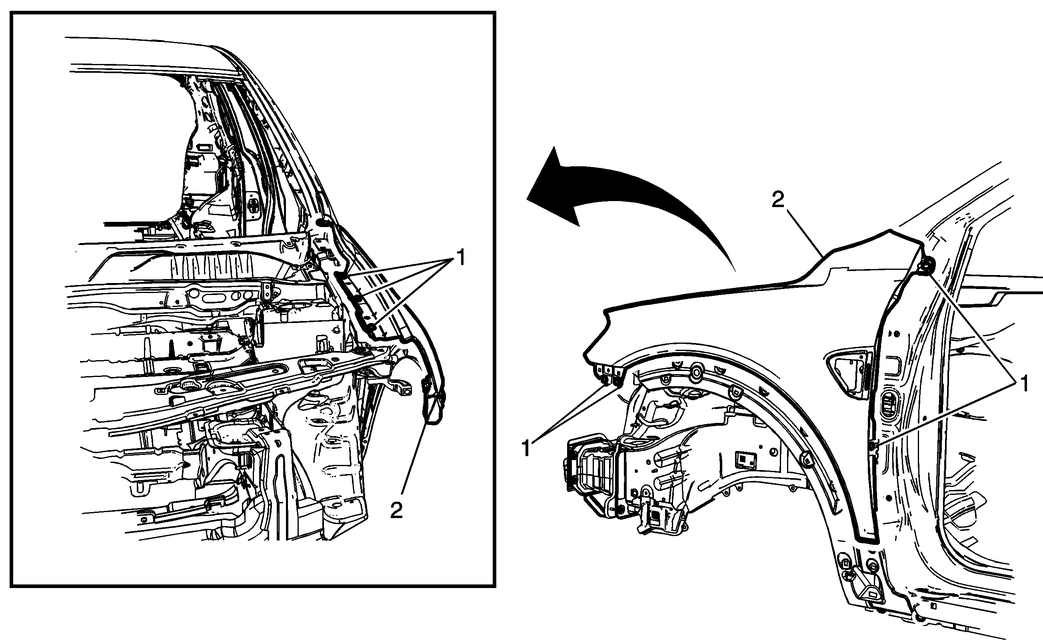
Fig.
1 Fender removal
The fender on a Chevy Captiva 2014 plays a vital role in protecting the vehicle's wheels and suspension components from road debris, mud, and other environmental elements. Over time, fenders can become damaged due to accidents, corrosion, or wear and tear, necessitating removal and replacement. The process of removing and installing a fender involves several detailed steps to ensure proper alignment and secure attachment, maintaining the vehicle's structural integrity and appearance.
To remove the fender, the vehicle must first be safely parked and supported. The removal process typically starts with disconnecting the battery to prevent any electrical issues. The next step involves removing the front bumper cover, which may require taking out several screws, bolts, and plastic fasteners. Once the bumper is out of the way, the headlight assembly and any associated trim pieces are also removed. This allows access to the bolts and screws that secure the fender to the vehicle's frame. Carefully unbolting these components and disconnecting any attached wiring harnesses or clips will free the fender from the vehicle.
Installing the new fender is essentially the reverse of the removal process. The new fender must be carefully aligned with the mounting points on the vehicle's frame to ensure a proper fit. Once aligned, the fender is secured with bolts and screws, and all previously removed components, such as the headlight assembly and bumper cover, are reattached. Ensuring all connections and fasteners are properly tightened and aligned is crucial for the fender to function correctly and maintain the vehicle's aesthetics. After installation, a thorough inspection is recommended to verify that all parts are securely in place and that the fender fits seamlessly with the surrounding panels. Properly executed, this process restores the vehicle's appearance and ensures continued protection of critical components.
Do not damage any inner panels
or reinforcements.
If the location of the original
plug weld holes can not be determined, space the plug weld holes every 1
1/2 inches ap ...
Removal
1.
Remove tire and wheel assembly.
2.
Remove six fender liner screws,
Fig. 1.
3.
Remove four fender ...
 Cowl Panel
 Fender Liner