Chevrolet Captiva Service & Repair Manual: Fender Liner
Removal
|
Installation
| Reverse procedure to install. Torque screws to 22 inch lbs. |

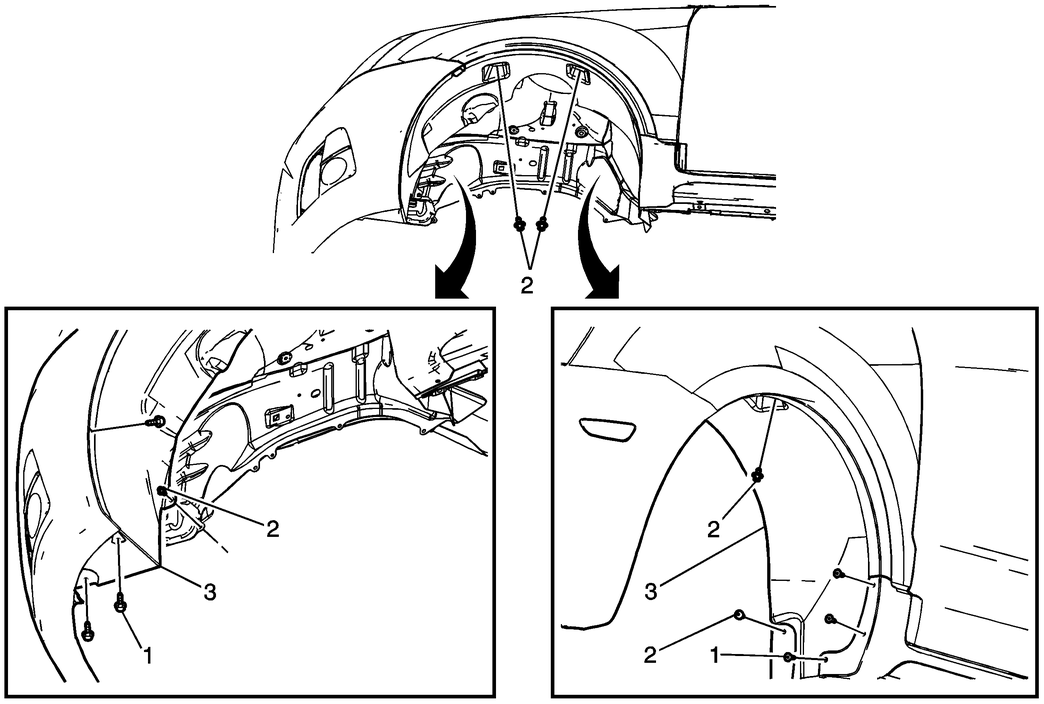
Fig. 1 Fender liner removal
Fender liner in 2012 Chevrolet Captiva is a protective component that shields the wheel well and engine bay from debris, water, and road grime. Removing and installing the fender liner involves a few straightforward steps that can be completed with basic tools.
To remove the fender liner, begin by parking the vehicle on a flat surface and turning off the engine. Gather the necessary tools, including a flathead screwdriver, a socket set, and plastic trim removal tools. Start by turning the front wheels to gain better access to the fender liner. Use the flathead screwdriver or trim removal tool to carefully pry off the plastic clips and screws that secure the fender liner to the wheel well and fender. There may also be fasteners along the edge of the bumper and underneath the vehicle that need to be removed. Once all the clips and screws are removed, gently pull the fender liner away from the wheel well, taking care not to damage it or any surrounding components.
Installing the new fender liner is essentially the reverse of the removal process. Align the new fender liner with the wheel well, ensuring that all holes and edges match up with the corresponding points on the vehicle. Begin by securing the liner with the plastic clips and screws along the wheel well and fender edges. Reattach any fasteners along the bumper and underneath the vehicle, ensuring they are tightly secured. Double-check all connections to make sure the fender liner is firmly in place and there are no loose parts. Turn the wheels back to their normal position and inspect the liner to ensure it fits properly and provides adequate protection. By following these steps, you can effectively remove and install the fender liner on 2012 Chevrolet Captiva, maintaining its protective function and contributing to the overall durability of the vehicle.
 Fender
Removal
1.
Remove front bumper as outlined in
Front Bumper.
2.
Remove fender wheel opening molding.
3.
Remo ...
 Front Bumper
Removal
1.
Remove front compartment front sight
shield.
2.
Remove front screws from front wheelhouse
liner.
...
More about:
Chevrolet Captiva Owners Manual > Driving and Operating: Ride Control Systems
Traction Control/Electronic Stability Control
System Operation
The vehicle has a Traction Control
System (TCS) and StabiliTrak®, an
electronic stability control system.
These systems help limit wheel slip
and assist the driver in maintaining
control, especially on slippery road
conditions ...
Chevrolet Captiva Owners Manual
- Introduction
- In Brief
- Keys, Doors, and Windows
- Seats and Restraints
- Storage
- Instruments and Controls
- Lighting
- Infotainment System
- Climate Controls
- Driving and Operating
- Vehicle Care
- Service and Maintenance
- Technical Data
- OnStar
