Chevrolet Captiva Service & Repair Manual: Fuel Door
Removal
|
Installation
| Reverse procedure to install. Torque fuel door bolts to 22 inch lbs. |

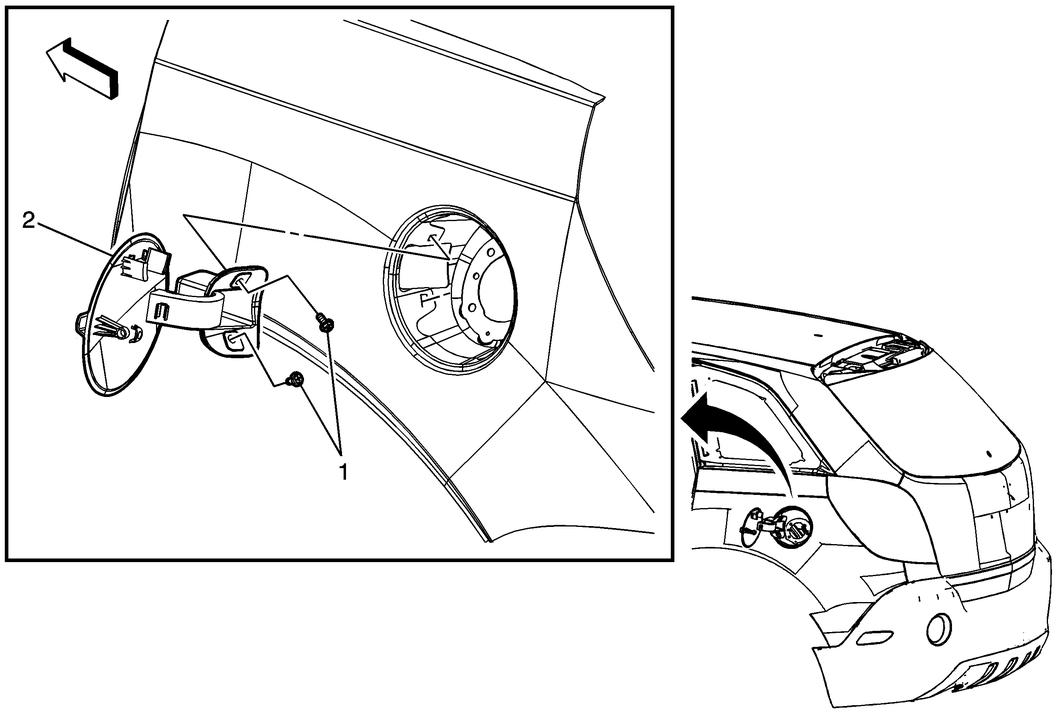
Fig. 1 Fuel door removal
To remove the fuel door, start by opening it to access the inside. Look for any screws or bolts securing the fuel door assembly to the body of the vehicle. These fasteners may be hidden behind trim pieces or rubber gaskets. Using the appropriate tools like a screwdriver or socket wrench, carefully remove these fasteners. Be cautious not to damage surrounding paint or trim during this process.
Once the fasteners are removed, gently pull the fuel door assembly away from the vehicle's body. Take care not to force it or cause any unnecessary strain. If there are any electrical connectors or cables attached to the fuel door, disconnect them carefully. This step ensures that the door can be fully removed without any obstructions.
Now, for the installation, start by aligning the new fuel door assembly with the opening on the vehicle's body. Reconnect any electrical connectors or cables that were detached during the removal process. Carefully position the fuel door assembly to ensure it sits flush against the body without any gaps or misalignment. Insert and tighten the screws or bolts to secure the fuel door assembly in place, following the manufacturer's specifications. Test the fuel door by opening and closing it to ensure proper operation and alignment. Once confirmed, close the fuel door securely, and your installation is complete.
Always refer to the vehicle's service manual or consult with a professional mechanic if you're unsure about any step in the process.
 Front Wheelhouse
Do not damage any inner panels
or reinforcements.
If the location of the original
plug weld holes can not be determined, space the plug weld holes every 1
1/2 inches ap ...
 Grille
Removal
1.
Remove front bumper as outlined in
Front Bumper.
2.
Remove radiator grille emblem.
3.
Remove six ...
More about:
Chevrolet Captiva Owners Manual > Bulb Replacement: Headlamps
To replace one of the headlamp
bulbs, use the following procedure.
To replace the parking/turn signal
lamp bulb, see Front Turn Signal
and Parking Lamps on page 10-28.
Open the hood. See Hood on
page 10-3.
Remove the filler panel
fasteners (1) and remove the
filler panel.
...
Chevrolet Captiva Owners Manual
- Introduction
- In Brief
- Keys, Doors, and Windows
- Seats and Restraints
- Storage
- Instruments and Controls
- Lighting
- Infotainment System
- Climate Controls
- Driving and Operating
- Vehicle Care
- Service and Maintenance
- Technical Data
- OnStar
