Chevrolet Captiva Service & Repair Manual: Door Lock Actuator R&R
Front
| 1. |
Remove front door trim panel. |
| 2. |
Remove water deflector. |
| 3. |
Release front inside door handle cable
retainers from door. |
| 4. |
Remove door latch (2) retaining screws
(1), Fig. 1. |
| 5. |
Disconnect door latch electrical connector. |
| 6. |
Disconnect door latch rods. |
| 7. |
Remove front door latch. |
| 8. |
Reverse procedure to install, note
following: |
| |
a. |
Transfer front door latch rods. |
| |
b. |
Torque door latch retaining
screws to 89 inch lbs. |
|
Rear
| 1. |
Remove rear door trim panel. |
| 2. |
Remove water deflector. |
| 3. |
Release inside door handle cable retainers
from door. |
| 4. |
Remove door latch (2) retaining screws
(1), Fig. 2. |
| 5. |
Disconnect door latch electrical connector. |
| 6. |
Disconnect door latch rods. |
| 7. |
Remove rear door latch. |
| 8. |
Reverse procedure to install, note
following: |
| |
a. |
Transfer rear door latch rods. |
| |
b. |
Torque door latch retaining
screws to 89 inch lbs. |
|
Liftgate
| 1. |
Remove liftgate trim panel. |
| 2. |
Remove liftgate latch (2) retaining
screws (1), Fig. 3. |
| 3. |
Disconnect liftgate latch electrical
connector. |
| 4. |
Remove liftgate latch. |
| 5. |
Reverse procedure to install. Torque
door latch retaining screws to 89 inch lbs. |
|
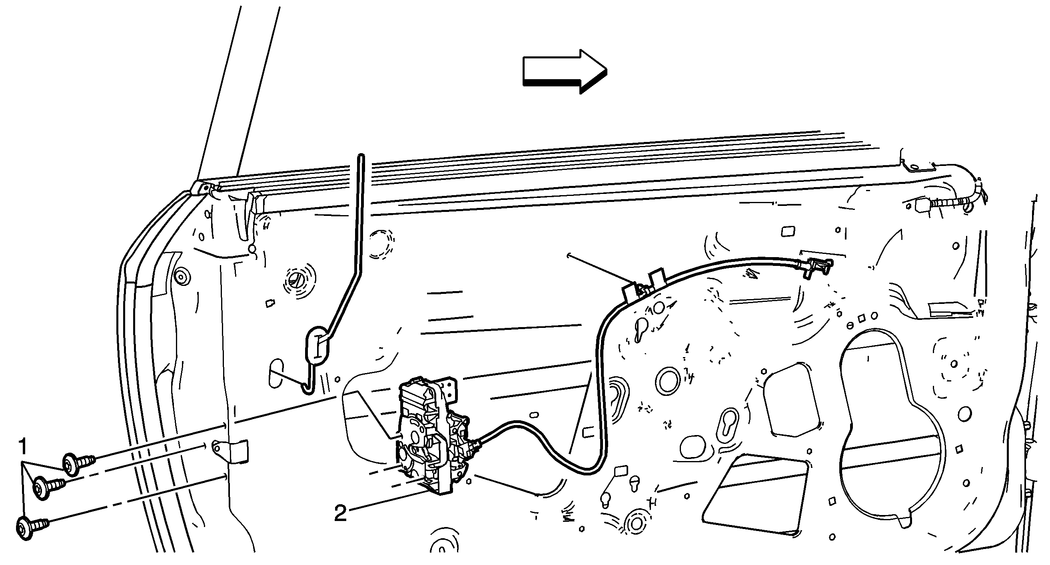
Fig.
1 Door latch removal. Front
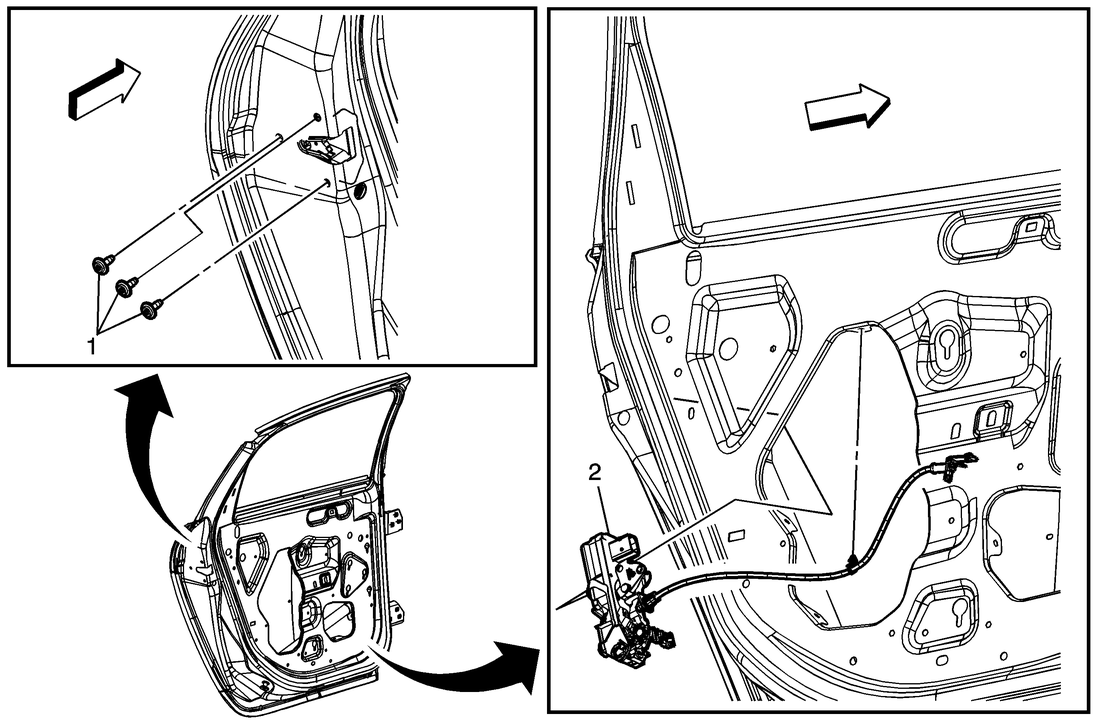
Fig.
2 Door latch removal. Rear
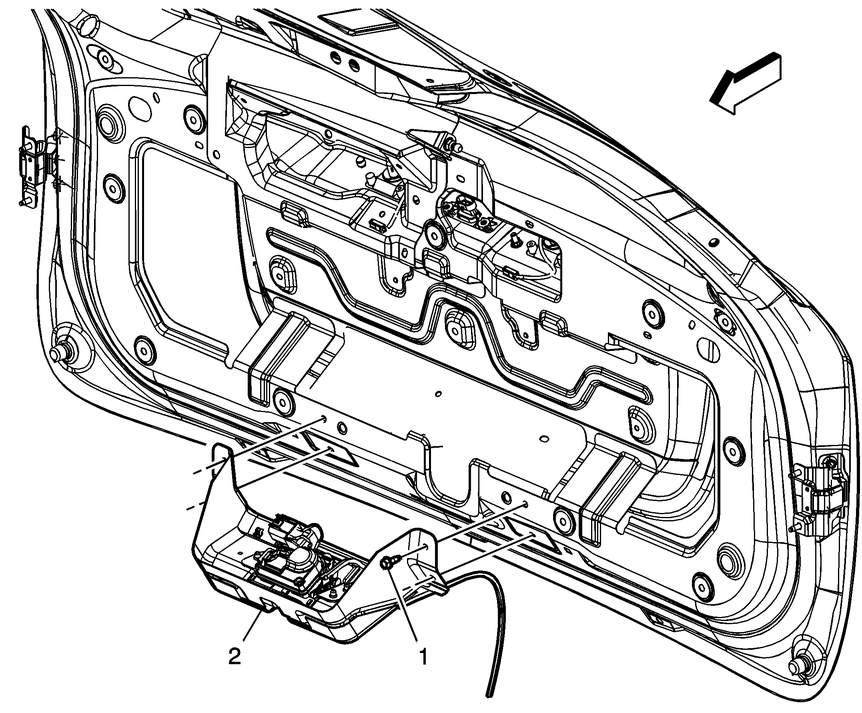
Fig.
3 Liftgate latch removal
Servicing the door lock actuator in a Chevrolet Captiva 2014-2018 is a task that involves accessing the inner components of the door panel. Begin by removing the door panel carefully to avoid damaging it. This typically involves locating and removing screws and clips around the edges of the panel. Once the panel is off, you can access the door lock actuator, which is usually attached to the door latch mechanism and connected to the locking rod.
Disconnect any electrical connectors and wiring attached to the actuator before proceeding with its removal. This step ensures safety and prevents damage to the electrical components. Unscrew or unbolt the actuator from the door frame and take note of its position and orientation for proper installation of the new actuator.
When installing the new door lock actuator, position it correctly and secure it with screws or bolts. Reconnect the electrical connectors and wiring, ensuring they are properly secured. Before reassembling the door panel, test the new actuator to ensure it locks and unlocks the door smoothly using the door lock switch or key fob.
After confirming the functionality of the new actuator, reattach the door panel carefully, ensuring all clips and screws are secured properly. Finally, perform a final check by testing the door lock function again to ensure everything is working correctly. Regular maintenance and timely replacement of door lock actuators are essential to maintain the security and functionality of your Chevrolet Captiva's locking system.
1.
Remove door trim panel as outlined
under "Door Trim Panel."
2.
Remove door water deflector.
3.
...
Refer to Fig. 1
when performing following procedures.
1.
Remove front door trim panel as outlined
under "Door Trim Panel."
...
 Door Latch
 Door Lock Cylinder