Chevrolet Captiva Service & Repair Manual: Headliner
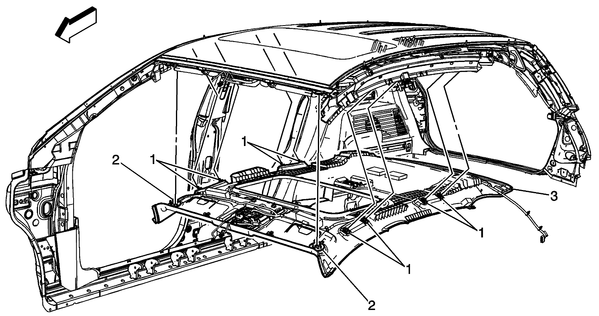
| Refer to Fig. 1
when performing following procedures. |
| 1. |
Remove windshield garnish molding. |
| 2. |
Remove sunshade anchors, sunshade assembly
and disconnect electrical connector. |
| 3. |
Remove front and rear assist handle,
then roof rail front assist handle assembly. |
| 4. |
Remove overhead console as outlined
under "Overhead Console." |
| 5. |
Remove center pillar lower garnish
molding and center pillar upper trim panel. |
| 6. |
Remove rear quarter lower trim panel
and rear quarter upper trim panel as outlined under "Rear Quarter
Trim Panel." |
| 7. |
Remove rear overhead console as outlined
under "Overhead Console." |
| 8. |
Remove three push retainers located
at rear edge of headliner. |
| 9. |
Remove headliner trim panel assembly
and disconnect electrical connectors. |
| 10. |
Reverse procedure to install, noting
following: |
| |
a. |
Torque sunshade anchor screws
to 27 inch lbs. |
| |
b. |
Torque roof rail front assist
handle screws to 53 inch lbs. |
|

Fig.
1 Exploded view of headliner. Captiva Sport
Chevrolet Captiva's (C100, C140) headliner is a crucial element of its interior, providing insulation, sound dampening, and an aesthetically pleasing finish to the cabin. In the Chevrolet Captiva Service & Repair Manual, there are detailed instructions for the removal and installation of the headliner, ensuring proper maintenance and repair procedures.
To begin the removal process, technicians typically disconnect any electrical components attached to the headliner, such as interior lights or overhead consoles. Next, trim pieces and moldings securing the headliner in place are carefully removed, taking care not to damage surrounding interior parts.
Once access is gained, the headliner panel is detached from the vehicle's interior by loosening and removing fasteners like screws or clips. Following the manual's guidelines is crucial to prevent damage to the headliner or other interior components during removal.
After removal, technicians can assess the headliner for any damage, stains, or wear that may require replacement. The manual provides guidance on selecting the appropriate replacement headliner and ensuring a proper fit with the Captiva's interior dimensions and design.
During installation, technicians reverse the removal steps. They position the replacement headliner panel carefully, secure it with the correct fasteners, and reconnect any electrical components. Adjustments may be necessary to ensure a snug fit and seamless appearance in the vehicle's interior.
Headliner Removal and Installation section of the Chevrolet Captiva Service & Repair Manual offers comprehensive instructions to help maintain the vehicle's interior aesthetics and functionality. Following these procedures correctly ensures the headliner's proper condition and contributes to a comfortable and visually pleasing cabin environment.
1.
Remove front seat assembly bolts.
2.
Lift seat upward at rear of seat.
3.
Disconnect seat electrical connectors ...
Warning: When a hood hold open
device is being removed or installed, provide alternate support to avoid
possibility of damage to vehicle or personal injury.
...

 Floor Console
 Hood Support Strut R&R