Chevrolet Captiva Service & Repair Manual: Drive Belt R&R
| 1. |
Remove air cleaner assembly. |
| 2. |
Remove righthand engine splash shield. |
| 3. |
Rotate drive belt tensioner, using
a suitable tool, Fig. 1. |
| 4. |
Remove drive belt from pulleys and
tensioner, Fig. 1. |
| 5. |
Clean and inspect drive belt surfaces
of all pulleys. |
| 6. |
Inspect drive belt for correct alignment. |
| 7. |
Reverse procedure to install. |
|
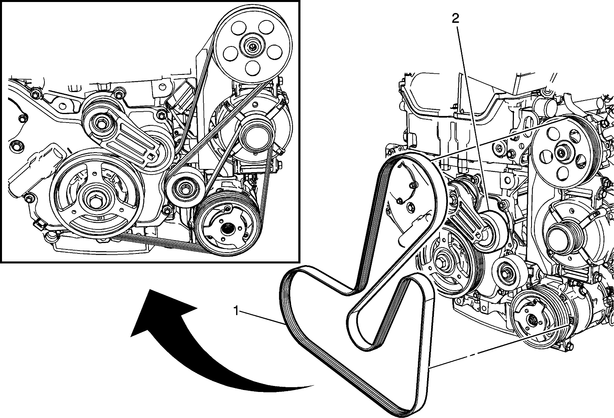
Fig.
1 Drive belt removal
Removing the drive belt from a Chevrolet Captiva manufactured between 2006 and 2018 involves several key steps. Locate the drive belt at the front of the engine, connected to components like the alternator and power steering pump. Identify the belt tensioner pulley, usually smooth and spring-loaded, and use an appropriate tool to release tension. Carefully slip the belt off one component while holding the tensioner pulley, then remove it from the remaining parts.
If necessary, install a new belt following the reverse procedure of removal, referring to the belt routing diagram for correct installation in the article. After installing the belt, start the engine and ensure proper tension and alignment. This process ensures smooth operation and longevity of the drive belt in your Chevrolet Captiva.
1.
Remove drive belt.
2.
Remove drive belt idler pulley bolt,
Fig. 1.
3.
Remove drive belt idler pulley,
...
1.
Remove drive belt.
2.
Remove drive belt tensioner bolt,
Fig. 1.
3.
Remove drive belt tensioner, Fig.
...
 Drive Belt Idler Pulley R&R
 Drive Belt Tensioner R&R