Chevrolet Captiva Service & Repair Manual: Front Bumper Reinforcement
Removal
| 1. |
Remove front bumper as outlined in
Front Bumper. |
| 2. |
Remove hood latch bracket. |
| 3. |
Remove eight front bumper impact bar
bolts, Fig. 1. |
| 4. |
Remove front bumper reinforcement. |
| 5. |
Disconnect electrical connectors and
harnesses as required. |
|
Installation
| Reverse procedure to install.
Torque reinforcement bolts to 22 ft. lbs. |
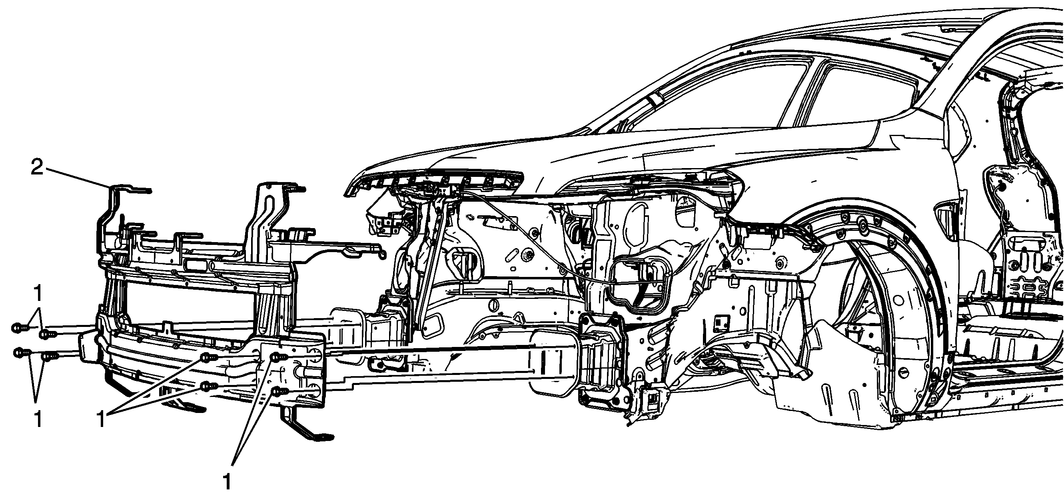
Fig.
1 Front bumper reinforcement removal
The front bumper reinforcement in the Chevrolet Captiva 2013 is a critical safety component designed to absorb and distribute impact energy during a collision. To remove the front bumper reinforcement, first, remove the front bumper as per the outlined procedure, followed by the hood latch bracket. Then, remove the eight bolts securing the front bumper impact bar and disconnect any necessary electrical connectors and harnesses.
During installation, reverse the removal procedure, ensuring all components are securely reattached.
Removal
1.
Remove front compartment front sight
shield.
2.
Remove front screws from front wheelhouse
liner.
...
Removal
1.
Disable Supplemental Inflatable Restraint
(SIR) system.
2.
Remove front door trim panel.
3.
Remo ...
 Front Bumper
 Front Door