Chevrolet Captiva Service & Repair Manual: Stabilizer Bar Link Kit R&R
Front
| Use proper size Allen wrench to
keep front stabilizer shaft link ball stud from rotating while removing
or installing front stabilizer shaft link nut. |
| 1. |
Remove front tire and wheel assembly. |
| 2. |
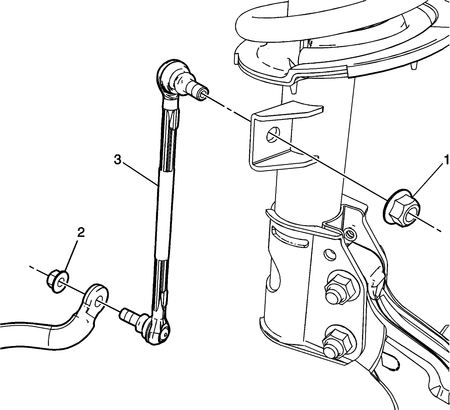
Remove front stabilizer shaft link
nut, Fig. 1. |
| 3. |
Remove front stabilizer shaft link,
Fig. 1. |
| 4. |
Reverse procedure to install. Torque
front stabilizer shaft link nuts to 63 ft. lbs. |
|
Rear
| Use a 90 degree bend TORX® bit
to hold ball stud when loosening or tightening nut. |
| When disconnecting stabilizer
link, hold link with a wrench to prevent turning. |
| 1. |
Raise and support vehicle. |
| 2. |
Remove rear tire and wheel assembly. |
| 3. |
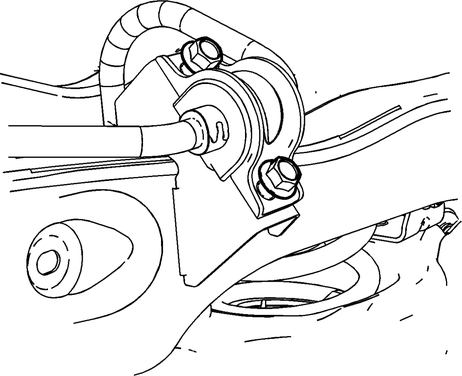
Loosen stabilizer shaft clamp bolts,
Fig. 2. |
| 4. |
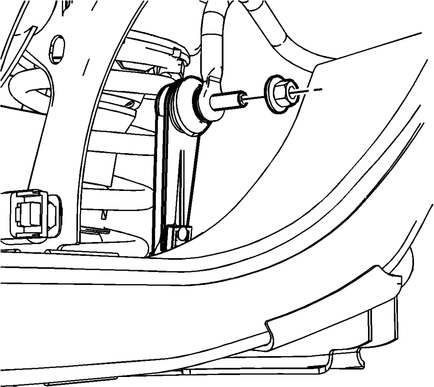
Remove stabilizer link to stabilizer
shaft nut, Fig. 3. |
| 5. |
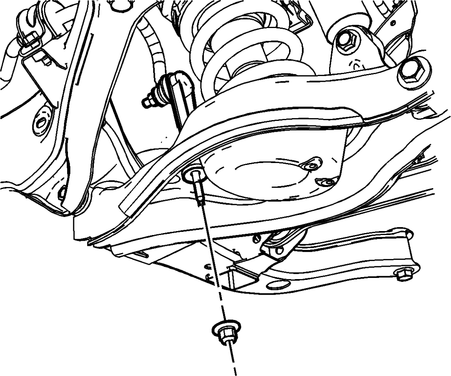
Remove stabilizer link to lower control
arm nut, Fig. 4. |
| 6. |
Remove stabilizer link from vehicle. |
| 7. |
Reverse procedure to install, noting
following: |
| |
a. |
Torque stabilizer shaft clamp
bolts to 52 ft. lbs. |
| |
b. |
Torque stabilizer link nut to
37 ft. lbs. |
|

Fig.
1

Fig.
2

Fig.
3

Fig.
4
Replacing the stabilizer bar link kit on your Chevrolet Captiva (C100, C140) involves several steps but is manageable with basic tools. Start by lifting the front of the vehicle and securing it on jack stands for safety. Locate the stabilizer bar link attached to the sway bar and control arm, and use appropriate tools to loosen and remove the nuts securing the link. Carefully pull out the old stabilizer bar link, noting any washers or spacers for reinstallation.
Next, insert the new stabilizer bar link into the sway bar and control arm, aligning it with the mounting holes. Reinstall any washers or spacers in their original positions and tighten the new nuts onto the ball joint studs of the stabilizer bar link. Torque the nuts according to the manufacturer's specifications to ensure proper tightness. Lower the vehicle from the jack stands, test the suspension for any unusual noises or play, and take the Captiva for a test drive to evaluate the stability and handling with the new stabilizer bar link kit installed.
It's essential to refer to the vehicle's service manual for specific torque values and any model-specific instructions during the stabilizer bar link replacement process. If you're not confident or comfortable performing these tasks, consider seeking assistance from a professional mechanic or authorized service center to ensure a successful installation and optimal performance of your Captiva's suspension system.
Front
1.
Remove front tire and wheel assemblies.
2.
Remove front stabilizer shaft insulator
clamp bolt, Fig. 1.
3 ...
Front
1.
Remove engine splash shield.
2.
Separate steering linkage outer tie
rod on lefthand side at steering knuckle, Fig. 1.
...
More about:
Chevrolet Captiva Owners Manual > Seats and Restraints: Child Restraints
Older Children
Older children who have outgrown
booster seats should wear the
vehicle safety belts.
The manufacturer instructions that
come with the booster seat state the
weight and height limitations for that
booster. Use a booster seat with a
lap-shoulder belt until the child
passe ...


 Stabilizer Bar Bushing R&R
 Stabilizer Bar R&R